- Go to the website https://www.draw.io/. You will be offered the option to save your files to Google Drive, Dropbox, Device, or Browser, so choose whichever is most convenient for you.
- You will be given the option to “Create new diagram”, or alternatively to “Open existing diagram” if you wish to return to a piece you were working on earlier, so select one of these. If creating a new diagram, you will be asked to name it, and to choose from a number of templates. If you look at the list of templates, you will see there is a dazzling array available, though because this project is very focused it will probably be best to choose “Basic (1)” as your template and “Blank diagram” as your option. Then click “Create”.
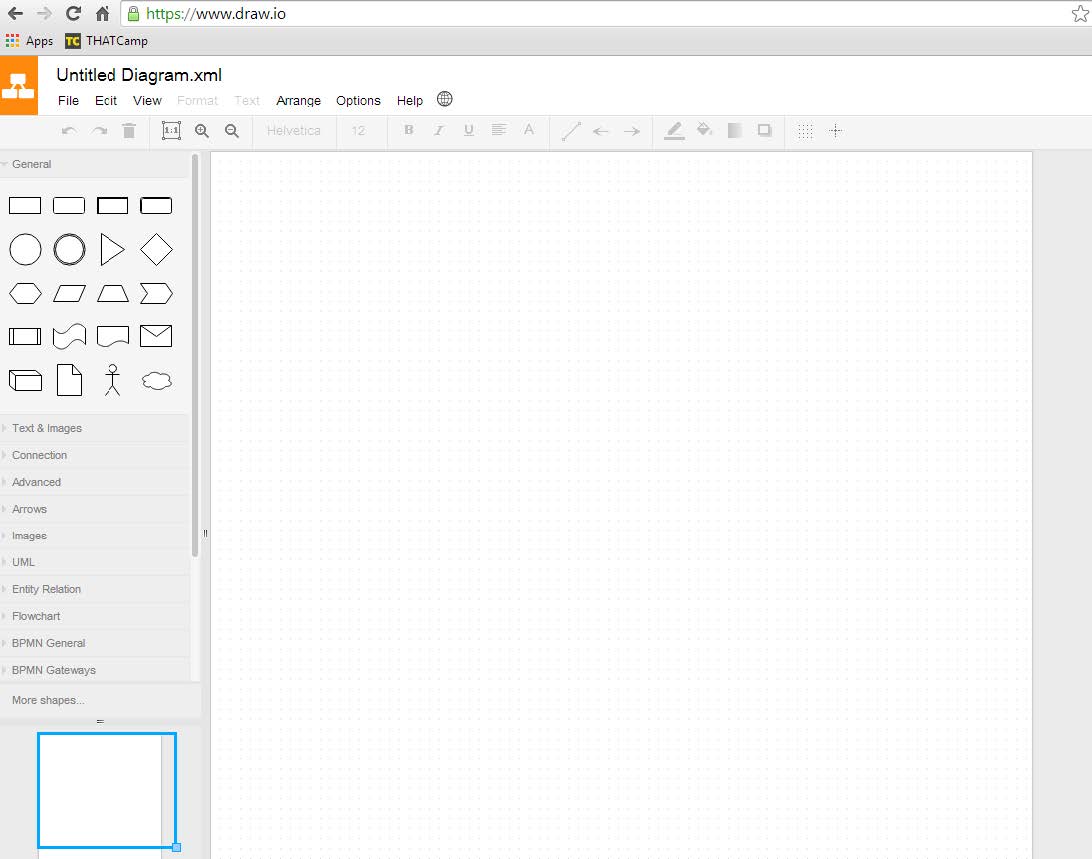
- Now you should have a page which looks like this:
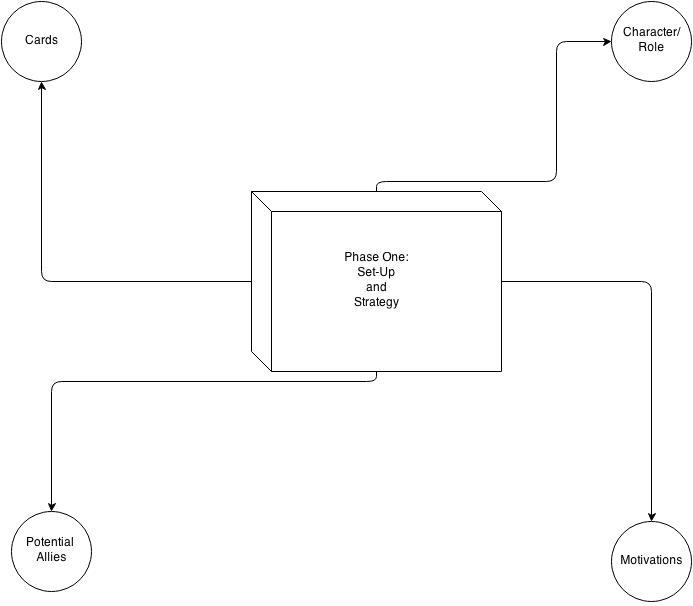
- To begin making your diagram, think about (a) how many steps of your gaming process you intend to document; (b) what shapes might best represent those different steps. It might be effective to make one overarching diagram which shows each of, say, four key strategic phases in your game, before making individual diagrams documenting each of those key stages in detail. For example, your main diagram might look like this:

Then you could make separate diagrams for each of the four phases identified; here is a sample for Phase One:
- Once you have decided on the outline for your diagram, including the text and the shapes which you want to use, you can start by simply dragging and dropping the appropriate shapes from the left-hand sidebar into the main window. You will see the faint gridlines on the screen which should help you to align each shape.
- To add text to shapes, in the sidebar click on the tab for “Text & Images”. To add just plain text, choose the “Simple text” option, and drag and drop it onto the main screen.
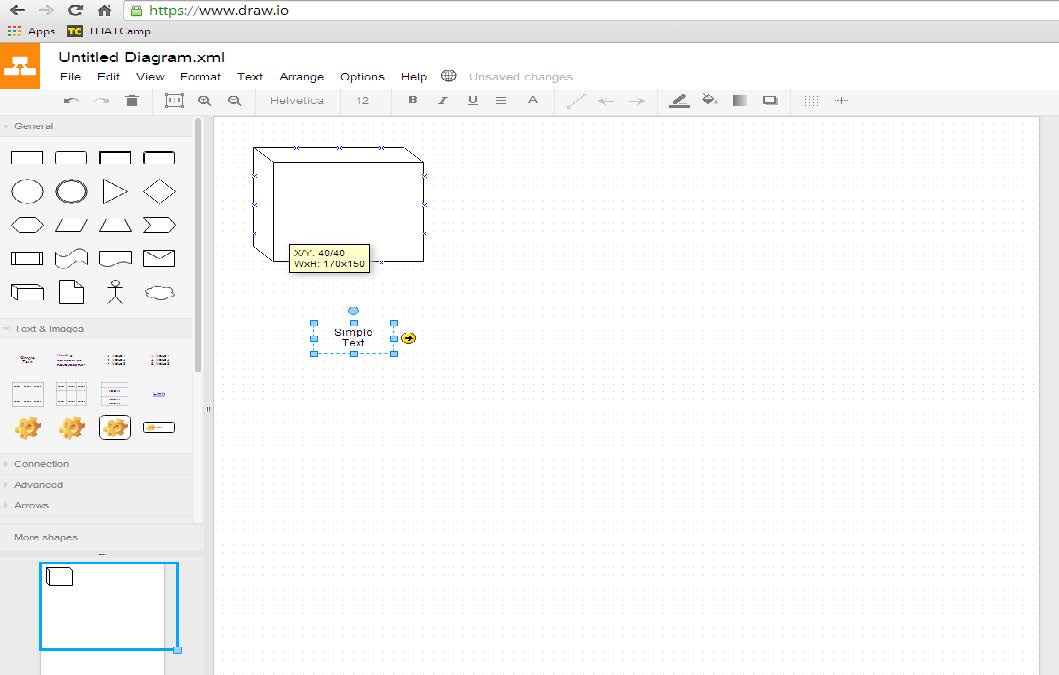
- You can then position it inside the shape of your choice, again by dragging and dropping:
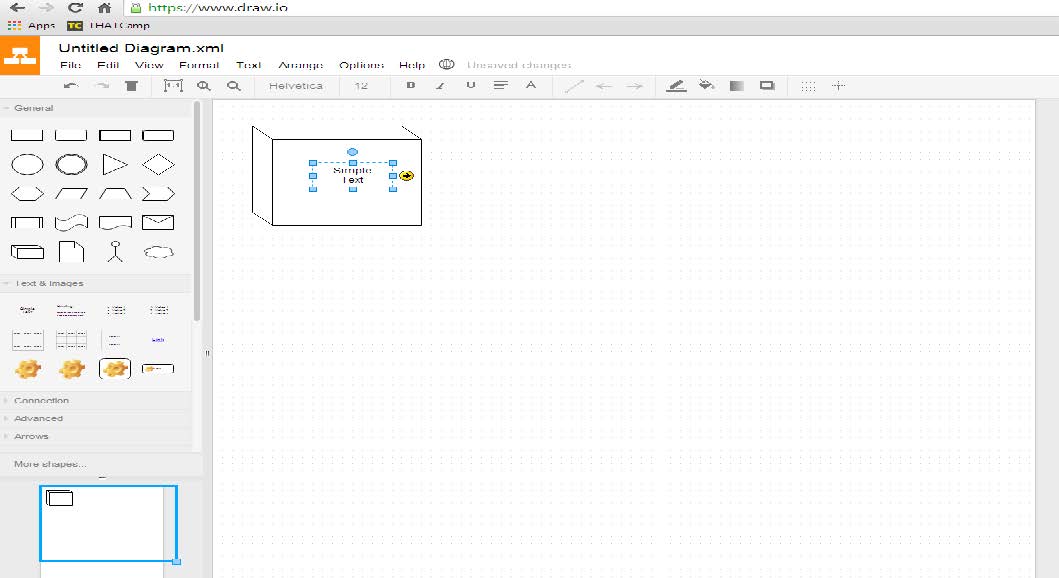
- To edit the text to add your own words, simply double click on the text and then you will be able to type straight into that space. You will be able to tell if Draw.io thinks you want to edit the shape or the text box because whichever one is active will be highlighted with a light blue outline.
- You can also add images (e.g. photographs from your gaming session), simply by dragging and dropping these from the desktop onto the main window in Draw.io
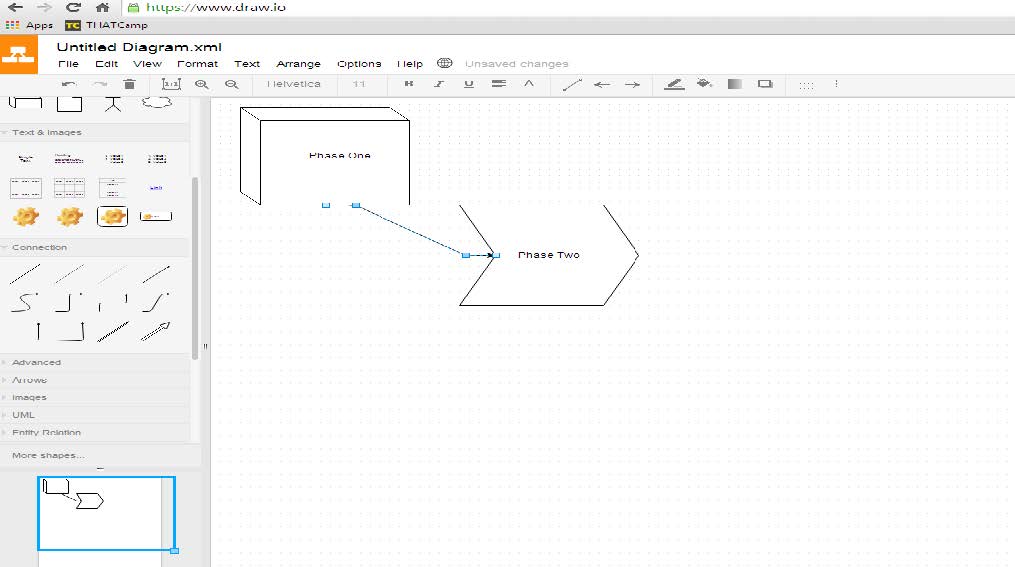
- You will probably want to indicate connections between the different phases or components documented in the shapes, text, and images in your diagram. There are several different ways of doing this, and the one you choose will depend on your aims for your diagram:
- To make a simple connection indicated by an arrow, choose the tab in the sidebar marked “Connection”. You will see many different types of arrows; I would recommend that marked “Entity connection” as it is very flexible, and will allow you to connect any shape with ease (NB there is a separate tab marked with this name, too, but in this case just the arrow under “Connection” will do). Drag and drop the arrow of your choice into the main page near to the items you want to connect. The arrow will have blue squares at its beginning and end. If you click and hold these, you can drag them until they connect with the shape which you wish either to be your starting point or your destination, as appropriate.
- Alternatively, you will see an option on the side bar to make a “Flowchart”. This gives you some options which will allow you to visualize binary choices you may have had to make during game play. Again, simply drag and drop the connecting symbol of your choice near to the items you wish to connect on the main Draw.io page:
- To make a simple connection indicated by an arrow, choose the tab in the sidebar marked “Connection”. You will see many different types of arrows; I would recommend that marked “Entity connection” as it is very flexible, and will allow you to connect any shape with ease (NB there is a separate tab marked with this name, too, but in this case just the arrow under “Connection” will do). Drag and drop the arrow of your choice into the main page near to the items you want to connect. The arrow will have blue squares at its beginning and end. If you click and hold these, you can drag them until they connect with the shape which you wish either to be your starting point or your destination, as appropriate.

Finishing:
Once you have assembled your completed diagram, you will want to export this for use in your WordPress post. Click “File” in the top menu and “Download as”. You will be offered multiple options, and we recommend you choose JPEG. Then, save the file in this form to the secure location of your choice, and you will be able to insert it into your WordPress post in the same manner as any other image (see separate instructions for making posts and pages in WordPress).